
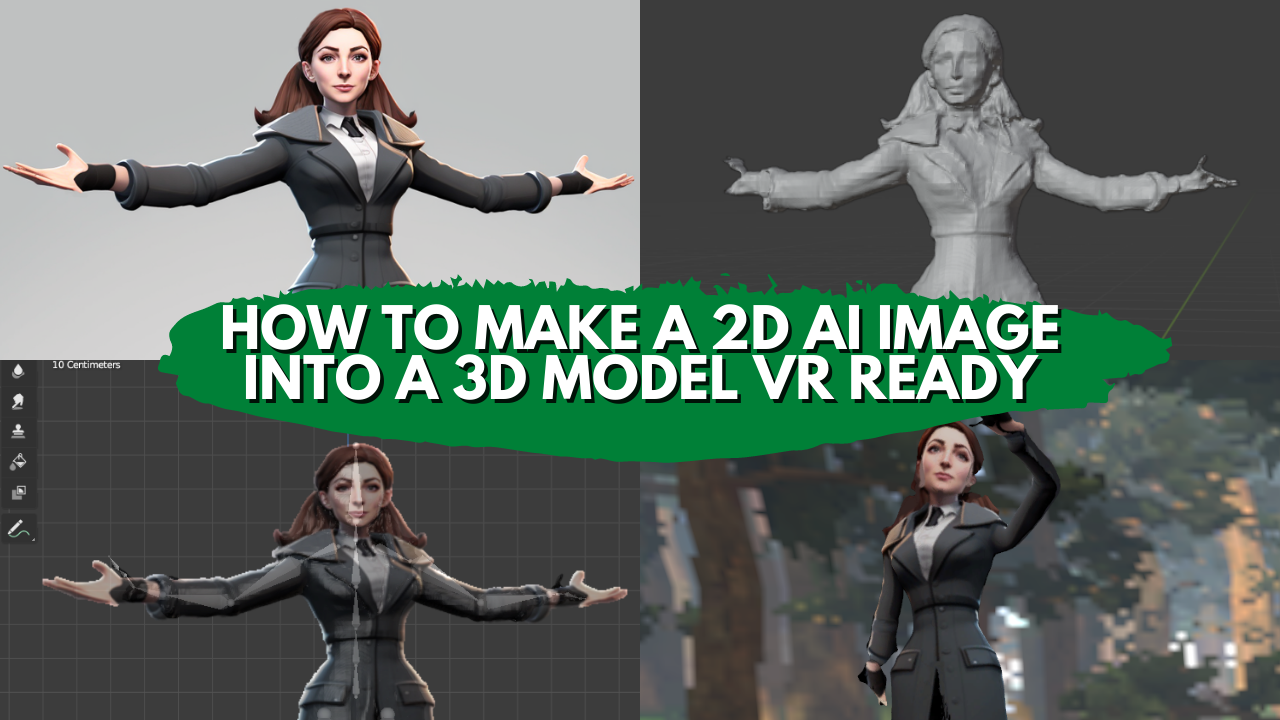
Ai art is taking the world by storm. You can create amazing and wonderful art pieces with just a few words. A great use for this is the ability to take a 2D Art piece and make it into a 3D VR-ready design.
Every tool that I use here is free or open source. It is a lot of steps. This is a great way to make VR chat avatars or get started with your interest in Game Design.

")
Table of Contents
- 1 Before we begin this 2D AI To 3D Art Journey
- 2 1)Generate a 3D-looking AI Character image
- 3 2) Use ICON on Hugging Space
- 4 2) (OLD) Install Open Pose
- 5 3) (OLD) Install PIFUHD
- 6 4) 3D Model Editing
- 7 5) Make a 3D model on Mixamo
- 8
- 9 6) Install CATS Blender Plugin
- 10 7) Import Your 3D Model And Add Textures and Color
- 11 Adding a Stencil For Quick Material
- 12 Final Thoughts on How to Convert a 2D AI Image to a 3D VR-Ready Model
Before we begin this 2D AI To 3D Art Journey
****UPDATE***** 1/14/2023 – We have a new ‘code free’ alternative. No Coding skills are now needed and you can make a 3d model in about 5 minutes.
——-
Word of warning. The current amount of steps is not for the faint of heart. This currently requires a wide range of coding knowledge to be possible. You will need to be familiar with installing from GitHub, setting up your environment, installing python, and running that type of code. I will not be going over that in this tutorial.
Another warning. If you don’t understand this kind of code, you can seriously mess up your computer. Use at your own risk.
Finally… This is not production-level 3D model creation. It’s pretty rough. But it’s a great place to start and getting yourself familiar with these tools.
I am actively searching out different technologies that will hopefully make this easier… On to the AI 2D to 3D steps.
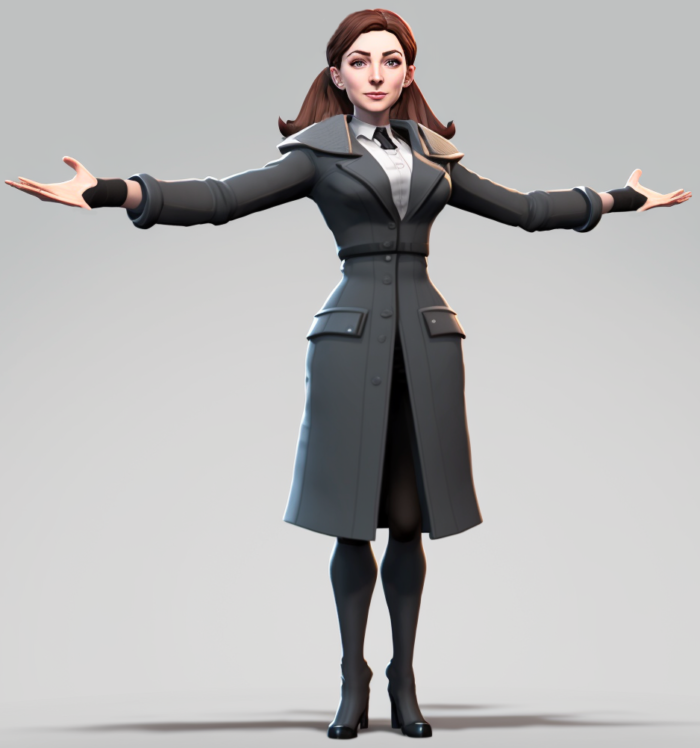
1)Generate a 3D-looking AI Character image
In order to make your life easier you should attempt to generate as front-facing as possible, with arms away from the body and legs slightly spread apart for the best modeling ease results. Other images will work but you made need more editing. You also need nothing in the background.
Here is a good example prompt that was created with a lot of help from the AI community. (and specifically Cyan Brown!) Of course, replace your character type in the correct spot. Male, female with a hoodie, male soldier whatever. It may take you a few tries to get a good one.
“full body videogame character asset of a female, arms spread wide and feet wide apart, front view, unreal engine”
Other helpful words to add in here to play around with – T pose, 3D mesh, female character front view standing prone, arms outstretched to sides, 3d studio max, maya
You should get something like this:
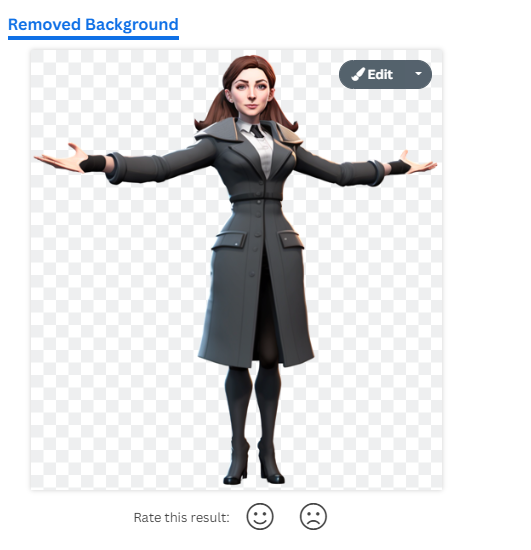
Remove the background (good free tool – https://www.remove.bg/) and any ‘extra’ parts or things you may want to adjust if needed in your photo editor of choice. If you are going to edit the hands, now is the time to do so. (I didn’t for this run through)
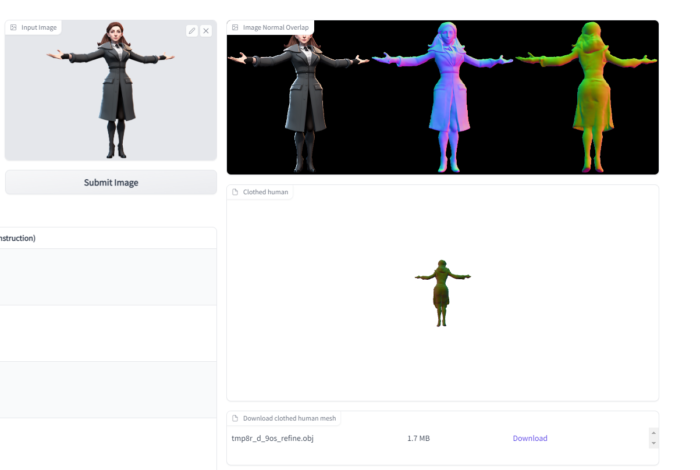
2) Use ICON on Hugging Space
You have 2 choices. ICON – Clothed Human Digitization on Hugging space or installing a WHOLE BUNCH of Github code that is pretty complicated. Most of you will choose ICON although it gives slightly different model results. I will leave all the old code steps up for reference, but as we continue to advance in this area easier tools will continue to be shown.
![]()
https://huggingface.co/spaces/Yuliang/ICON
(https://github.com/YuliangXiu/ICON) full Github code
Simply take your removed background image from the last image and upload it on the link above. Wait a bit. All done. It will output a clothed 3d .obj, a removed clothes option and even a .mp4 video all in about 5 minutes.
THE FOLLOWING STEPS ARE THE OLD VERY HARD CODE WAY. You can skip these and jump to STEP 4 if you have a completed model from above.
2) (OLD) Install Open Pose
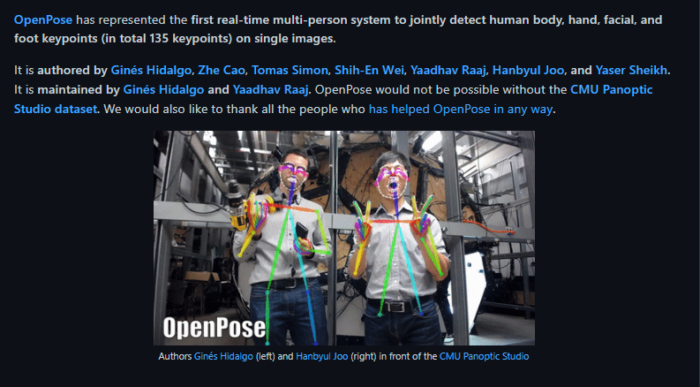
https://github.com/CMU-Perceptual-Computing-Lab/openpose/
OpenPose is open-source code available on GitHub that allows AI to scan an image to figure out where the body, face, hands, and feet are.
- Once OpenPose is installed you will need to install the models to use OpenPose. Navigate to the model’s directory to do that with this command
- Install Models –> /openpose/models/getmodels.bat
- I found I needed to move the model’s directory to the bin Directory to get it to work after it downloaded. Your mileage may vary.
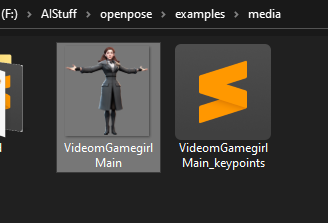
- Delete the sample images in /examples/media and add your AI image.
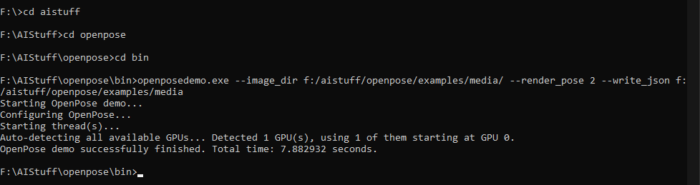
- Navigate to the /openpose/bin/ directory
- Run this magic command that took me a lot of troubleshooting to get. Remember to adjust your directories accordingly. Command —> openposedemo.exe –image_dir f:/aistuff/openpose/examples/media/ –render_pose 2 –write_json f:/aistuff/openpose/examples/media
- Wait. It will output a text base file in the same directory that will be needed for the next step.
Success Step 2 done!
3) (OLD) Install PIFUHD
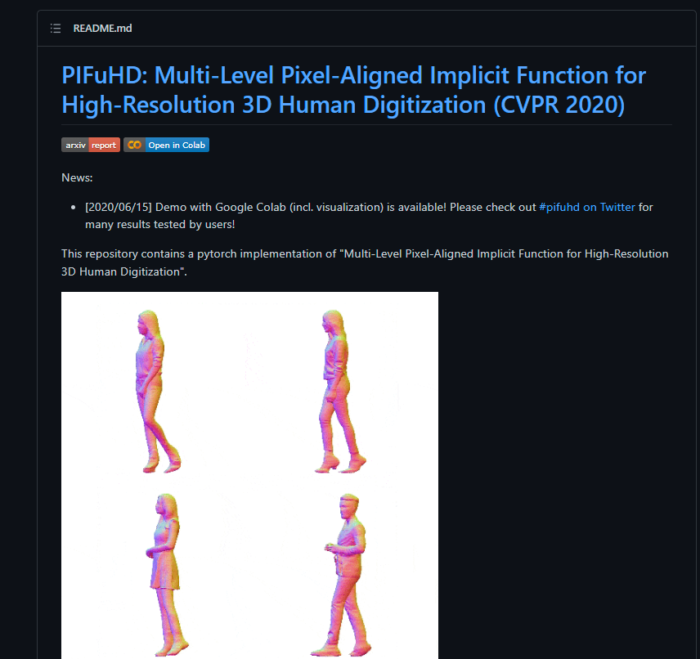
https://github.com/facebookresearch/pifuhd
This is where the magic happens. PIFUHD is open-source code available on Github from Facebook Research. High-Resolution 3D Human Digitization from A Single Image. This code takes the points we got in the previous code, scans your image, and creates a fully 3D obj file with a “guess” of what your character’s back looks like. It is not perfect, but it is pretty good.
- Copy outputted image and test_keypoints from Openpose to /pifuhd-main/sample_images

- Switch to /pifuhd-main directory
- Run command –> sh ./scripts/demo.sh
- Wait. This will take a bit.
- There may be some error messages but should be ok. Image obj file will be output to /pifuhd-main/result/pifuhd_final/recon. There should be a heat map file and a .obj

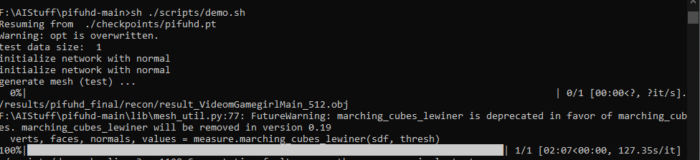
Success Step 3 is done and you now have a working OBJ 3D model of your human 2D image!
")
")
This section is a work in progress. There may be better ways to do all these steps but this is what is currently working for me.
4) 3D Model Editing
Open Blender- https://www.blender.org/ (or your 3d editor of choice) and have a look at how things look. You may need to clean up some floating pieces.
Select them in edit mode and then hit X and delete vertices to remove. You will likely have to do that a few times to remove the floating section.
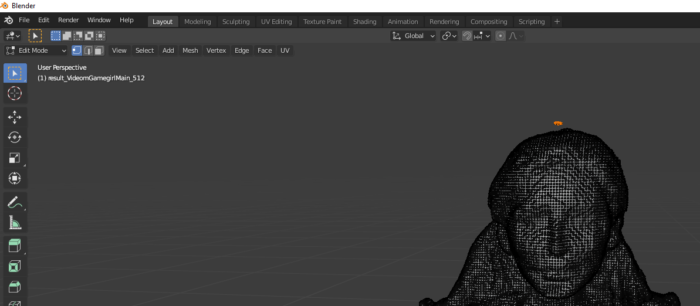
Export this very basic 3D as a .fbx file in blender.
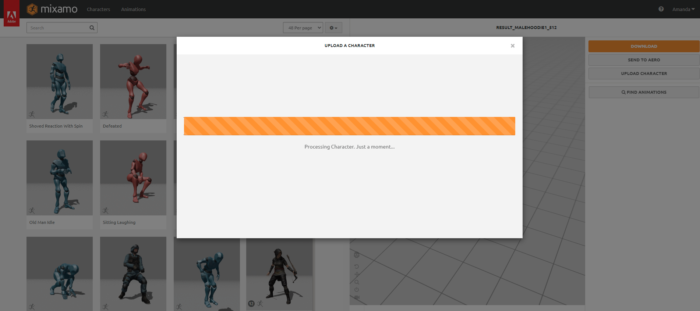
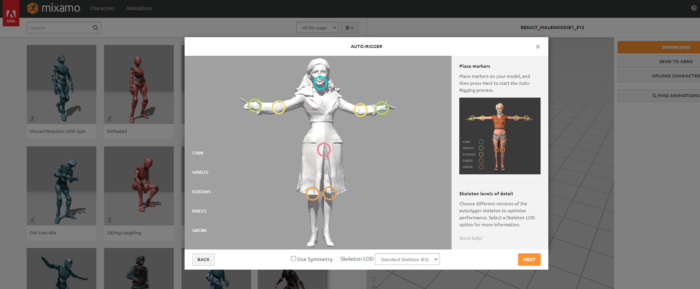
5) Make a 3D model on Mixamo
Mixamo is one of the easiest ways to auto-rig a 3D Human model. It’s free.
https://www.mixamo.com/
- Login to your adobe account or create one.
- Upload your character. It may take a while.

- Place the dots on the correct points of your character. You will likely need to turn symmetry off. Do your best guess.

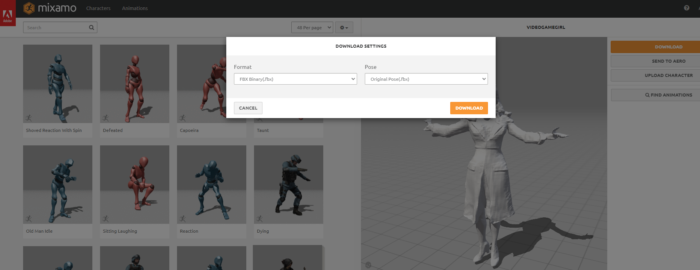
- Wait and once again Success. Download your character and make sure to select “original pose” as your choice for downloading. (You can also play around with the various styles to see your 2D AI created image now moving around! but make sure you download it as the base regular stock FBX file first)
6) Install CATS Blender Plugin
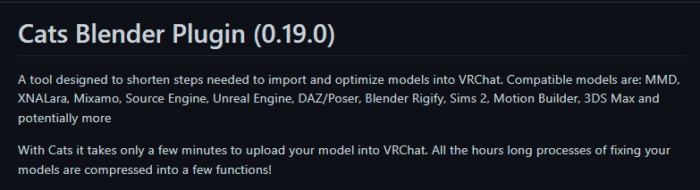
https://github.com/absolute-quantum/cats-blender-plugin/
This free tool is wildly used by VR Chat avatar creators. It will allow you to automate a bunch of steps as well as clean up our 2D to 3D model with a few button clicks.
You open CATS by press ‘n’ in blender and it will appear on your right toolbar.
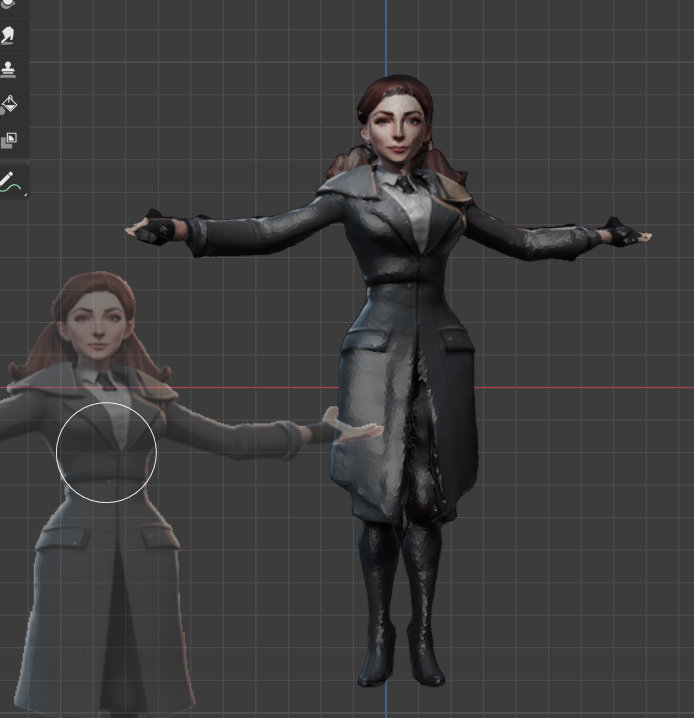
7) Import Your 3D Model And Add Textures and Color
- import via the CATS button plugin. Your model will appear in a strange squished shape.
- Select the Fix Model button right under the import button on the plugin. Wait.

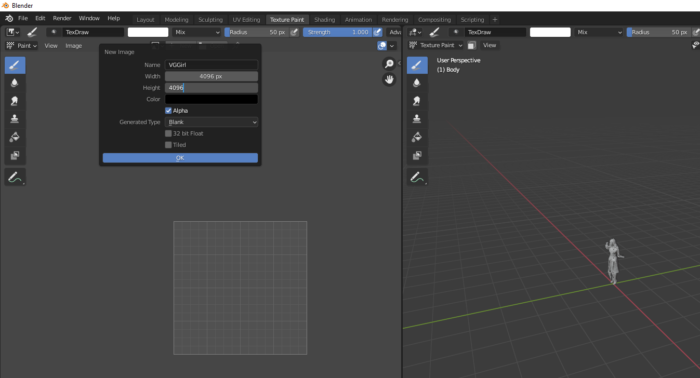
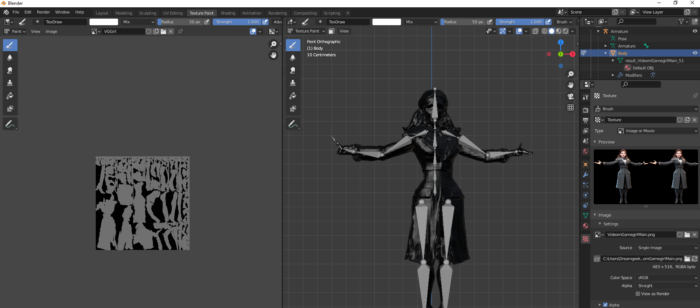
- Open Texture Paint Tab and Create a new Texture with 2096 by 2096

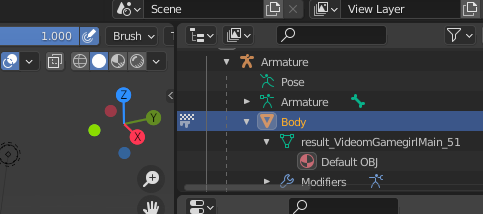
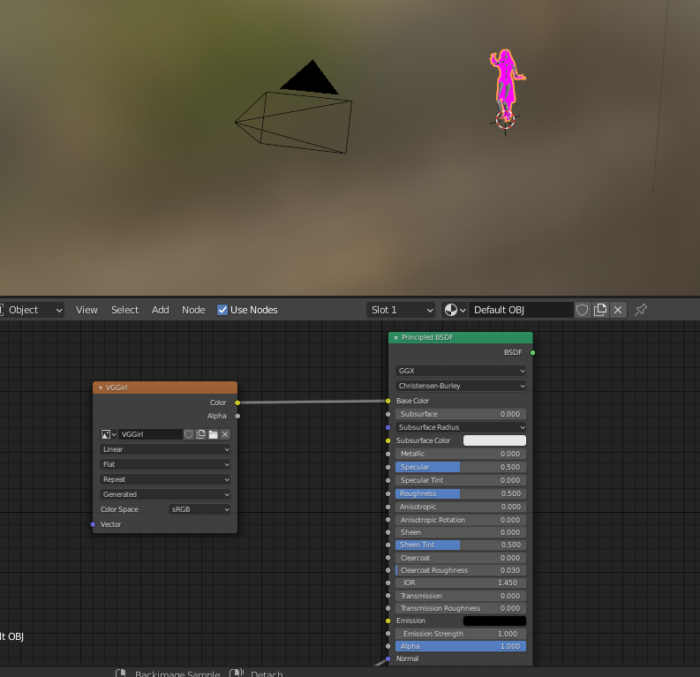
- Open Shading Tab. Select the Material under Armature (Body > Greentriangle and the name of your file > Default OBJ)

- Add Image Texture select your TexturePaint Created File from the little photo picture dropdown. Then link the Yellow color tab to the Yellow Base tab under Principled BSDF.

- Go to UV Editing Tab. Select all with ‘a’, then press ‘u’ then press Smart UV Project. Adjust the Island Margin to likely 0.010. You may need to play around with this. This step is not the greatest. If you have a better suggestion/tool for getting the UV in place please let me know! This works for now.


Adding a Stencil For Quick Material
Again.. I feel there is likely an easier way to add the image back to the 3d Source but creating a stencil texture brush and painting it on is what I found that works.
- Open the Texture Paint tab and zoom in on the model facing front.
- Select the Texture tab (Checkboard tab in the bottom right toolbar)
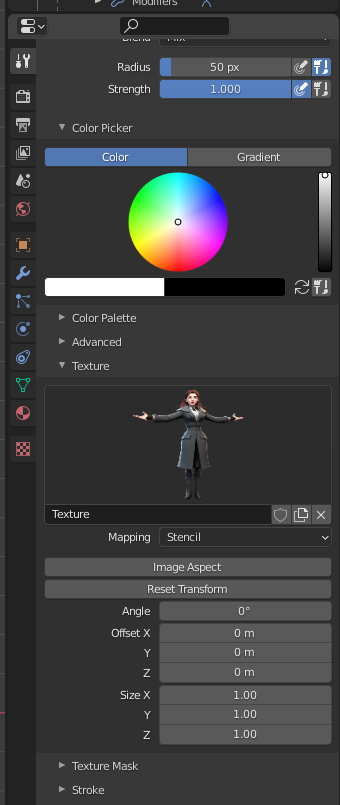
- Select New brush then image open and Select your Original No Background AI Created Image

- Select the Active tool Tab (The wrench and screwdriver on the top of the right tool bar). Scroll all the way down in this tool to find Texture and open that section up. Change Mapping from Tiled to Stencil.

- When you move your mouse back over the main model image. The original color AI image will be there. Use the right mouse button and Shift+right mouse button to size up and match as best you can the model image.
- Left mouse button will paint your image on top. This also is pretty rough and I’m sure there is a better way to do this but it gets the job done.

- Return to the texture tab and change the size to -1 on X and it will flip the stencil… this can help you to get a ROUGH paint on the back too. Then fill in any remaining black spots with the best colors you can.
Stay tuned.. I will create another post with how to upload this file into Unity and ultimately import it into VR chat (or your game of choice) 🙂
Final Thoughts on How to Convert a 2D AI Image to a 3D VR-Ready Model
Well.. if you stuck with me through all those steps you now have a working 3D VR ready model that you created from an AI 2D image! This 3d model is certainly not perfect, but it makes a pretty acceptable VR chat avatar. Especially if you do a bit of tweaking. This Technology is advancing every day.
Do you have a different way of turning a 2D AI image into a 3D Model? Let us know in the comments.